You are responsible for any changes you make or attempt to make to your e-bike. Removal of the speed limiter in public places such as streets, squares and cycle paths is FORBIDDEN BY THE LAW. Therefore it is possible to remove the speed limit in places such as circuits, tracks and private properties. Mounting the device may void the factory warranty with the manufacturer. Trailwatts declines all responsibility for any damage caused to pedal assisted bicycles on which the SL speed module system is fitted. Trailwatts declines all responsibility for damage to persons or objects caused in any way linked to the use of SL Speed Module.
1. Make sure bike is off and turning bike upside down is easiest for installation on Levo SL.
2. Remove Bashguard cover bolt – T25 torx.
3. Remove front motor/ guard bolt – T30 torx.
4. Remove Upper motor bolt – T30.
5. Loosen rear motor bolt (do not remove) – T30 torx.
6. Drive side, Remove centre bolt(T20 torx) and thenremove front motor bolt – T30 torx.
7. Bashguard/ motor cover can now be removed.
8.Undo the centre bolt (T25 torx) and remove chainguide, remove upper motor bolt – 5mm Allen Key.
9. Loosen rear motor bolt (4mm allen key) and pivot motor from front area to gain access to the speed sensor cable. Removal of rear wheel may be necessary to slacken 4mm bolt.
10. Disconnect speed sensor cable from motor and connect to SL module and connect SL module to the motor noting the male to female fitment and check alignment before pushing connectors together.
11. Place SL module within seat tube area and connector underneath the main battery leads (large gloss cables). The motor should refit smoothly, if any resistance please check cable position and refit.
12.Re-install upper and front motor bolts loosely to assist with reversal of above steps to complete install.
13. Once assembled, switch bike on and test ride. Always wear safety equipment especially a helmet.
Specialized Vado Installation
You are responsible for any changes you make or attempt to make to your e-bike. Removal of the speed limiter in public places such as streets, squares and cycle paths is FORBIDDEN BY THE LAW. Therefore it is possible to remove the speed limit in places such as circuits, tracks and private properties. Mounting the device may void the factory warranty with the manufacturer. Trailwatts declines all responsibility for any damage caused to pedal assisted bicycles on which the SL speed module system is fitted. Trailwatts declines all responsibility for damage to persons or objects caused in any way linked to the use of SL Speed Module.
1. Make sure bike is turned off and turning bike upside down is easiest for installation on Vado SL.
2. Undo Lower motor cover bolt – T25 torx and remove cover.
3. Remove the front two motor bolts non drive side and loosen the rear bolt closest to chainstay – T30 Torx.
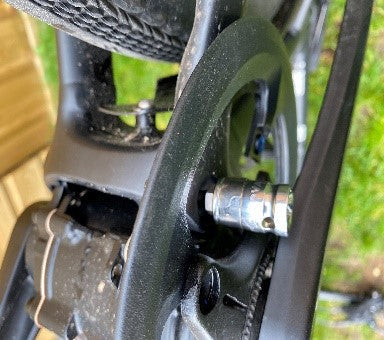
4. Remove chain from front chainring and undo all 4 bolts securing chainring to crank arm – M5 allen key.
5. Remove the two front motor bolts and loosen the rear motor bolt closest to chainstay/ swingarm – T30 torx.
6.Tilt the motor upwards and unplug the speed sensor cable which is closest to crank arm and connect SL module to the cable and connect female connector from SL module to motor noting the groove and pin alignment. Be careful when seating the connectors.
7. Once SL module connected to motor, tuck the SL module above motor and lower motor to align bolt holes. Beware of cable routing and make sure no cables are pinched when lowering motor into place.
8. Replace motor bolts loosely before tightening to factory specification. Make sure you tighten all 6 motor bolts.
9. Re-attach Chainring and tighten chainring bolts making sure chainring is secured correctly. Re-instate chain.
10. Fit motor cover.
11. Switch bike on and test ride to confirm derestricted and no TCU errors.


